Simulating Water with a Particle System (P5.js tutorial)

Particles represent the smallest unit of a material that retains its chemical identity; it’s a concept used in both physics and, funny enough, computer graphics.
Consider a stream of water - it appears as a continuous flow, but at a microscopic level, it's a collection of tiny particles. These particles are primarily water molecules, but they also include other substances dissolved in the water; I’ve talked about water and its hardness before.
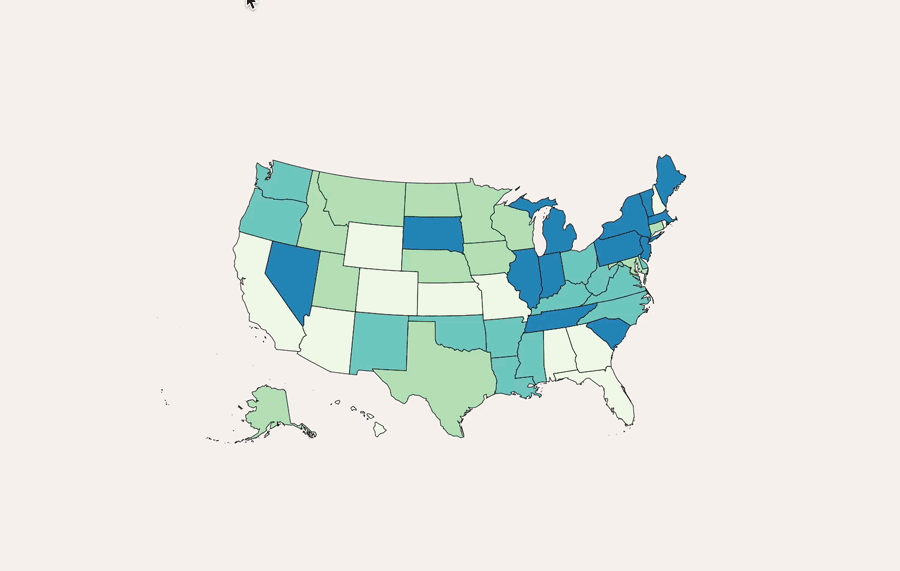
Find the Water Hardness of Your City
Lorem ipsum dolor sit amet, consectetur adipiscing elit, sed do eiusmod tempor incididunt ut labore et dolore magna aliqua. Ut enim ad minim veniam, quis nostrud exercitation ullamco laboris nisi ut aliquip ex ea commodo consequat.
Land use lorem ipsum dolor set
ipsum dolor set Source: Our World in DataGourmet Data is a reader-supported publication. To receive new posts and support my work, consider becoming a free or paid subscriber.
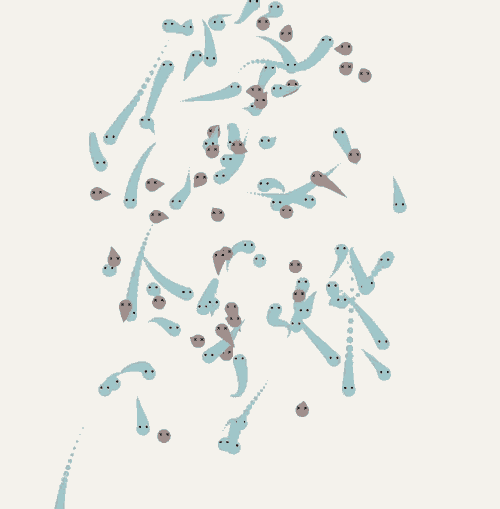
In code, all these molecules are visualized as small dots, and when we break them down, they each have properties like position, velocity, and color. Using those principles, I decided to write a guide on how I built the code. In our simulation, we'll represent water hardness by mixing water particles with a small percentage of calcium and magnesium particles.
A Primer on P5.js
P5.js is great for my more creative visualizations. It works by continuously redrawing its canvas every frame (usually 60 FPS), so that makes it great for simulations; you can define logic that determines how agents react as time goes on, and see what natural randomness does to those agents.
Particles are used to represent elements of larger systems, allowing us to display detailed depictions of complex phenomena. Daniel Shiffman has a chapter on this in his book, check it out.
To get this code working, I am using the P5.js code editor. If you were to build this from scratch, you would need to have an index file that loads in p5.js. Here’s a live page of a working code example.
Setting up the variables
In our P5.js simulation, the setup() function is where we define essential variables and initialize our system:
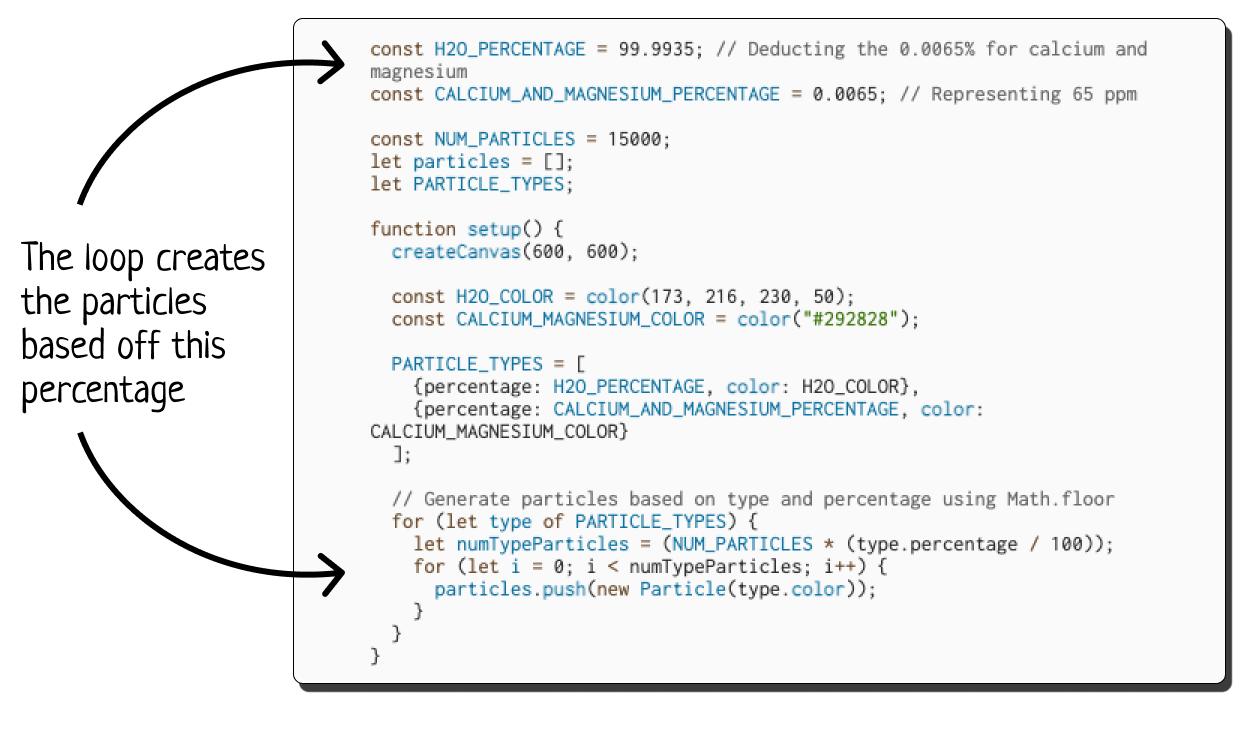
- NUM_PARTICLES: This constant defines the total number of particles in our simulation. I set it to 15,000 so it could be somewhat of a dense representation, and adding too many particles would slow the whole thing down too much.
- PARTICLE_TYPES: An array holding information about different particle types – in our case, water, calcium, and magnesium. Eventually I want to scale this to show more harmful chemicals, but those are measured in ppb (parts per billion) while calcium and magnesium can be found in ppm (parts per million). Since we only have 15k particles to work with, water hardness is the metric we’ll stick with.
- H20_COLOR and CALCIUM_AND_MAGNESIUM_COLOR set distinct colors for the particles so the end visual can look better.
The loop within setup() creates particles based on their type and percentage. This is where we implement the concept of water hardness by adjusting the proportion of water and mineral particles.
The Particle Class and Defining its Behaviors
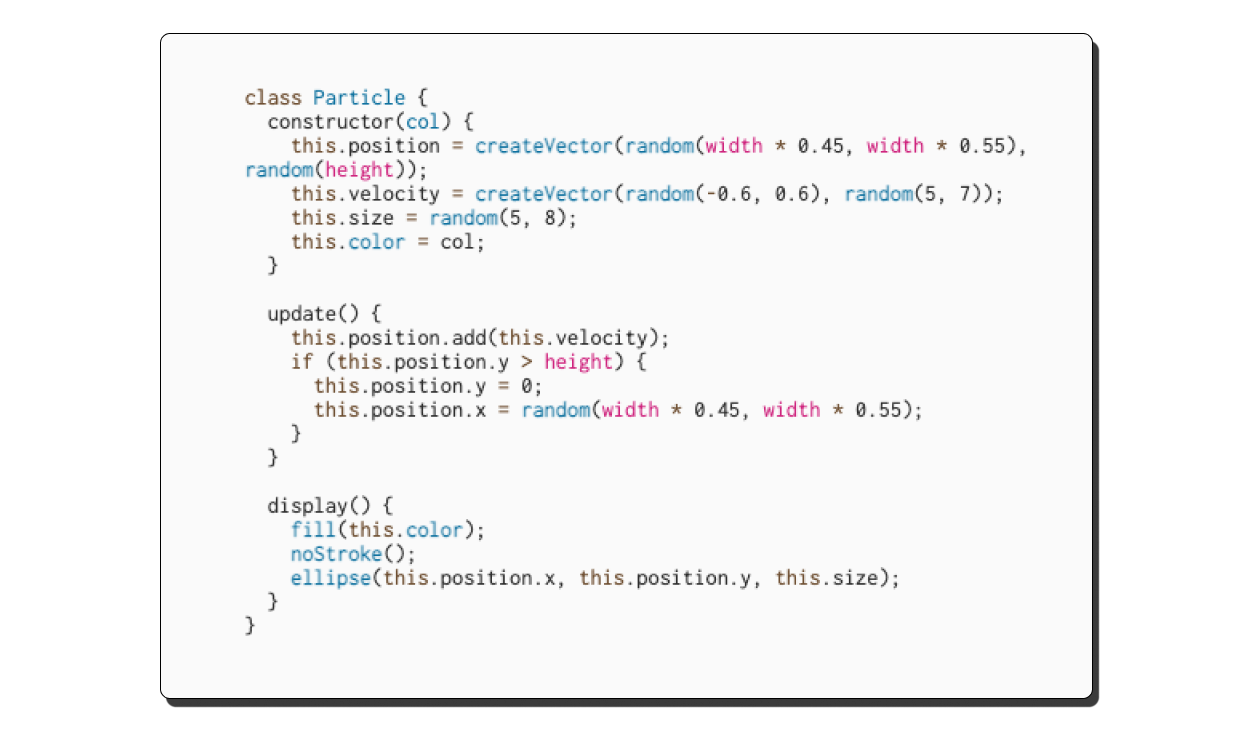
Each particle in our simulation will be an instance of the Particle class. As I mentioned before, water is just a stream of particles. In the class, we’ll is define the properties and behaviors of individual particles:
In object-oriented programming, classes generally have constructors, which set initial properties. For water, as every instance is passing by, we’ll need a particle’s position so we can keep track of it, a particle’s velocity so we can decide where it needs to go, and more constant properties like size and color.
We’ll also define two functions:
- display() Function: Handles the visual representation of the particle, drawing it on the canvas.
- update() Function: Dictates how particles move. In our case, particles will have a random velocity and will reappear at the top once they move off the screen.
Generating the Particles With A Loop
The particle creation loop in setup() iterates through each particle type and generates a number of particles proportional to its defined percentage. But it’s really the draw() function that brings this simulation to life.
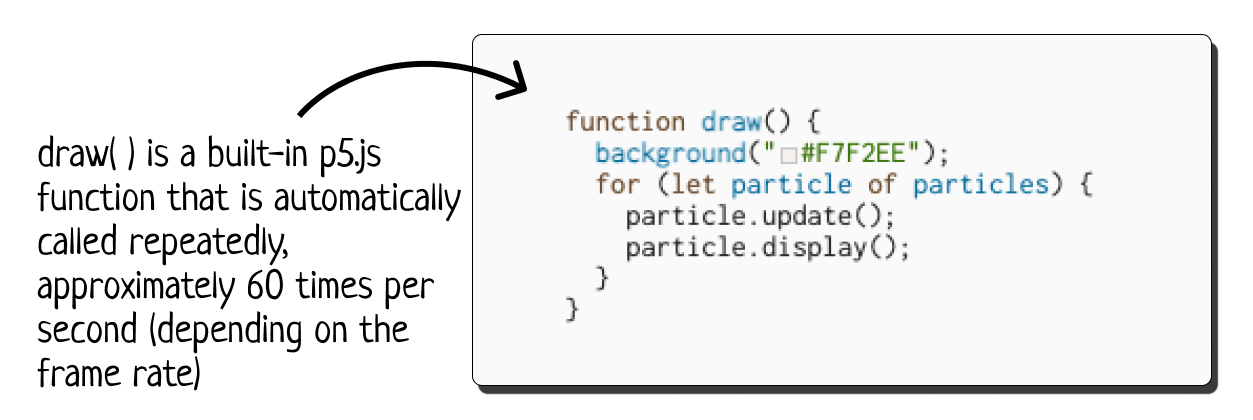
It's executed continuously and performs two primary tasks:
- Background Redraw: It redraws the background, creating the illusion of continuous motion.
- Particle Processing: The function goes through each particle, updating its position and redrawing it. This continuous process creates the dynamic flow of particles on the screen, simulating the movement of water and the elements within it.
Conclusion
By breaking down water into individual particles and simulating their behavior, we get a nice little perspective on the complexity of water, and how a stream really is a system rather than a singular entity.
Gourmet Data is a reader-supported publication. To receive new posts and support my work, consider becoming a free or paid subscriber.